USER GUIDE
Dedoose is an easy-to-use, collaborative, web based application that facilitates all types of research data management and analysis.
Here's what you need to know about how to use it.
Download full User Guide here:
DownloadImporting and Creating Media Files
The Media Workspace is where your media files are stored and you can find features to sort and manage these data.
Importing Media Files
You can import media in three ways:
- Click the Add Media button in the upper-right corner of the Media Workspace
- Click the Add Media button in the upper-right corner of the Media panel on your project’s Home Dashboard
- Click the Import Data button in the upper left panel of the project's Home Dashboard.
Once you are presented with the import menu:
- Select the type of media file you wish to import: text, audio, image, video or PDF
- Locate the file(s) on your local computer (note that text documents can be imported as a single file or in a group, but audio and video files are best be imported individually)
- Click Open.
If you select a single text file, you will be taken directly to that file in document view within Dedoose.
If you select multiple text files, you will see a Success pop-up that indicates your documents have been uploaded.
For audio and video files, you will see a progress bar and then get a pop-up after the import indicating that the file has been added and is being processing in the background. You can continue to work elsewhere in Dedoose while this occurs, and when the file finishes processing, you will get a pop-up notifying you that it has completed. Finally, please keep in mind that the process of video files can take some time depending on the queue on our servers for processing these routines.
TIP: When naming documents, it can be useful to implement a systematic and informative convention throughout your project. For example, the title '435MFGModerate' could be such a convention that represents cases with ID(number)Gender(Male or Female)Type(Focus Group, Interview, Observation)Socio-Economic Status(Low, Moderate, High)
TIP: When first uploading documents, it is often most efficient to immediately establish link(s) to descriptors, if appropriate, so these important relationships are not neglected. However, this may not always be possible if descriptor data have not yet been created. In any case, these links can be established or changed at any time by click the 'Descriptors' button.
Adding Text Documents Manually
To manually add a document to Dedoose:
- Click the 'Add Media' button in the upper-right corner of the Media Workspace or in the Media panel on your project Home Dashboard, or click the 'Import Data' button in the top left panel of the Home Dashboard
- Click 'Create a Blank Document'
- Type or copy and paste the text into the 'Content' field
- Provide a title, and if you wish, a brief description of the document (these can always be added or changed at a later point)
- Click 'Submit' and the document will then be presented in document view and is ready for viewing, excerpting, and linking to descriptors (if necessary).
Working with Images and PDFs
Working with Images
- Open an image by selecting it from the ‘Media’ list on the Home Dashboard or in the ‘Media’ Workspace
- Using the slider you can modify the size of the image for efficient excerpting
- Adjust image display characteristics by clicking the painter's palette icon in the image header to open the controls pop-up, making desired changes, and closing the palette
- Renaming: An image's title will be displayed in the upper left corner of the viewer panel. The 'edit' image button (cog icon) can be found in the upper right side of the viewing panel. Clicking this button presents a pop-up allowing you to rename the image by editing the title and clicking 'Submit'
- Deleting an image can also be done when in image edit mode by clicking the 'Delete Image' button in the lower left corner of the pop-up and then clicking 'Yes' to confirm.
Working with PDFs
Coding PDFs is essentially the same as coding other documents, bu with the added feature of being able to code either as text or as an image.
The first thing you may notice when you open a PDF in Dedoose is the added functionality at the top of the document. There is a page selector, buttons for moving forward or back a page, the selection mode, and a zoom bar. The page selector helps you jump to a page within the document. Type the page number you wish to see in the box and hit enter and you'll be taken directly to that page. Alternatively, you can move either one page forward or back with the arrow buttons.
To code text in a PDF:
- Make sure the selection mode is set to 'text.
- Using your cursor, highlight a segment of text you wish to code.
- You can either use the quick code widget by hitting the space bar or simply double click on the code in your code tree to create the excerpt and apply the tag.
To code regions in a PDF:
- Make sure the selection mode is set to 'image.'
- Using your cursor, highlight a portion of the image you wish to code.
- You can then either use the quick code widget by hitting the spacebar or simply double click on the code in your code tree to apply.
To use the zoom bar:
- Click on the slider.
- Adjust until the image is displayed at the desired size.
Sorting and Filtering Your Media
The Media Workspace has features for sorting your media files, customizing column views, and filtering by sub-group using Boolean operators. Using these features can be a quick way to locate or review sets of media files in your project.
Using these features can be a quick way to locate or review sets of media files in your project.
For example, looking at the Demo Project, if you wanted to find the set of files from families with full-time working fathers who showed increases in the quality of reading by the home's primary caretaker, you would follow these steps:
- Click the Uncheck All button in the Columns panel. (Note that only 20 columns can be viewed at a time.)
- Open the Field folder in the columns panel
- Click the checkboxes for “PC reading change group” and “Father work status” and you'll see the folders for these fields appear in the Filtering panel
- Open these folders in the Filtering panel and click the “Positive Change” and “Full Time” check boxes to filter your media files to just this subset.
Filters can be cleared by clicking the Clear Filters button at the bottom of the panel.
We call this tool our SuperMegaGrid and you'll see these filtering features in some other Dedoose Workspaces and in the Data Selector.
How to Edit a Document
Example of the document Search function
Working with Text Documents
Document Viewer
The Document Viewer allows you to browse the text, create and code excerpts, search for text, line number, or character location, and manage all aspects of the document.
There are a variety of controls for how you can view and work with your document.
- Line numbers and memos can be brought to view (see check boxes in upper left corner of the panel)
- Text direction default is left to right, but can be changed to go from right to left (see 'RTL' checkbox in upper left corner of document view)
- Font size can be adjusted (see control in lower left corner of document view).
Information on document creation date, creator, and number of excerpts is noted in document header along with buttons to create and link memos to the document and create and/or link descriptors.
Renaming, Deleting, Cloning, and Describing Documents
When viewing a document, the name of the document appears in the upper left corner of the viewer panel header. On the upper right side of the panel is the edit media button - (the cog icon). Clicking this button presents a pop-up to allow for media:
- Renaming - to rename the file, simply edit the title and click 'Submit'
- Describing - edit or add to the document description and save by clicking 'Submit'
- Deleting - clicking the 'Delete Document' button to remove the document from your project...and, yes, you will get a warning to confirm
- Editing - Click the 'Unlock Document' button and confirm that you wish to unlock and that you understand the requirements. You can edit the document as needed, save your changes, and then 'Save and Lock' to ready the document for viewing and excerpting
- Cloning - a document can be copied so that all the excerpt and codes are copied along with it. This is a useful feature for comparing coding decisions across team members. To do so, excerpt a document with no coding. Clone document for each team member and re-title each accordingly. Each team member can then apply codes independently for later comparison.
Text Searching
The magnifying glass icon in the upper right corner of the document panel provides access to your search tools. To search for a keyword or text string, enter the text and click 'Submit' Dedoose highlight all words with that string and allows you to move among the 'hits' using the 'Back' and 'Next' buttons. These following screenshot shows the search tool icon and pop-up. In this example we searched for 'reading' and the results show that there were 21 matches and each match highlighted in pink so you can easily move through your document to locate this text in context and conduct any appropriate excerpting, coding, and memoing. The search tool pop-up is a movable panel (just drag and drop the panel header), and also allows for searching by character position and line number.
Document Settings/Controls
In the Settings panel in the document viewer, located in the upper left, there are a few functions to control how your work is presented.
- Line #'s: This controls whether display of line numbers along the left side in the document is presented. Line numbers can help keep things organized, make it easier to remember where work has started or stopped, and help locate specific text within a document
- Memos: This controls whether a display of linked memo icons along the right edge of the document will be in view
- RTL: (right to left) This allows for treating right to left languages in a natural way—as opposed to the default display of text in Dedoose in an English language manner (left to right)
- Font Size: This allows you to control the character size of the text within your documents. Some monitors are easier to read than others and this control helps make it possible to view any document on any screen
- Color Scheme: This will allow you to change what colors are present in your excerpting and, perhaps, what meaning you have assigned to them. By default, Dedoose will automatically cycle through a set of colors as you create excerpts. However, you can choose colors to correspond with particular codes or set the system to display certain colors for certain users. This is just one more feature to help keep things displayed in a way that's most meaningful to you.
Working with Audio and Video Files
Audio and Video File Viewing and Listening
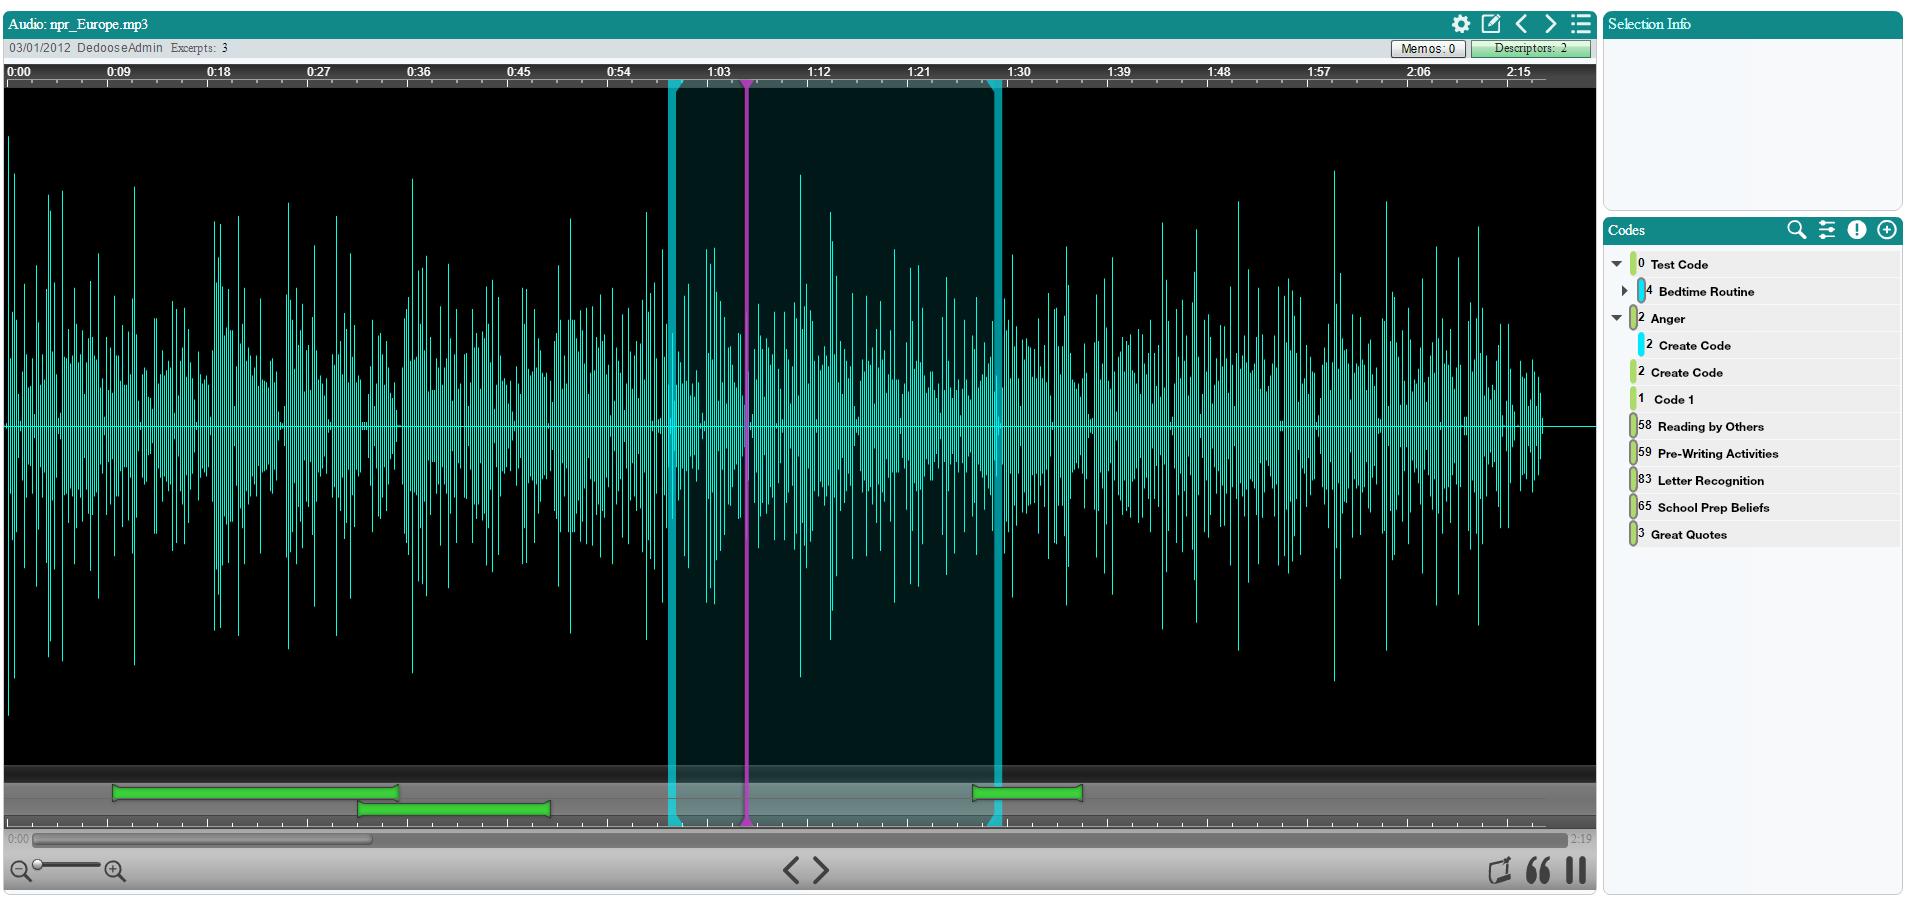
The audio and video viewer allows you to watch and/or listen to your media, create and code excerpts, create transcripts, and manage all aspects of the file.
Screenshot of the Video Viewer

The video viewer looks the same as the audio viewer above except a video will be shown in the primary viewing area. There are a variety of controls for how you can view and work with both your audio and video files.
- Play and pause the file in the viewing panel (shown above)
- View the media in a larger panel by clicking the 'Media View' button if you are working in transcript mode
- Zoom in and out on the timeline with the slider in the lower left.
The viewing panel will also have the name of the video along with a button to create and link excerpts, memos, and descriptors. You can also view the number of memos and descriptors that are currently linked to the file (shown in the screenshot above).
Renaming, Deleting, and Describing Audio and Video Files
When viewing an audio or video file, the name of the file appears in the upper left corner of the viewing panel and the edit button (cog icon) will be found in the upper right. Clicking this button presents a pop-up where you can control the media properties, including:
- Renaming - to rename the file, simply edit the title and click 'Submit'
- Describing - edit the file description and save by clicking 'Submit'
- Deleting Media - click the 'Delete Media' button to remove the file from your project, and yes, you will get a warning to confirm
- Deleting Transcript - click the 'Delete Transcript' button to remove the transcript from your file, and yes, you will also get a warning to confirm.
Importing Transcripts of Audio Stream
To import a transcript into Dedoose:
- Go to the Media Workspace
- Open the audio or video file you wish to work with
- Enter the transcript view by clicking the transcript view button
- Click the 'Import' button in the upper right corner of the transcript panel
- Click 'Yes' when you get a warning that importing a transcript will erase any current transcript
- Locate and choose the file you wish to import
- Click 'Open'
- Click 'Save' button in the lower right corner of the transcript panel...this is one of the few places in Dedoose where you have to actively save.
Adding Transcripts Manually
To add a transcript manually into Dedoose:
- Go to the Media Workspace
- Open the audio or video file you wish to work with
- Enter the transcript view workspace by clicking the transcript view button
- In the transcript panel, type the transcription
- When finished, make sure to hit the 'Save' button in the lower right corner of the transcript panel.
Editing Transcripts
Audio stream transcripts in Dedoose live within an active editor. To edit a transcript in Dedoose:
- Go to the Media Workspace
- Open the audio or video file you wish to work with
- Enter the transcript view workspace by clicking the transcript view button
- Edit the transcript as needed
- Click the 'Save' button.
Synchronizing Video/Audio Excerpts to a Transcription
To synchronize video/audio excerpts to transcribed text:
- Go to the Media Workspace
- Open the audio or video file you wish to work with
- Enter the transcript view workspace by clicking the transcript view button
- Enter editing mode for a specific excerpt by clicking the bar in the timeline defining its boundaries
- Click the 'Set Start' button in the lower left corner of the transcript view
- Click into the transcript where the associated text begins
- Click the 'Set End' button in the lower left corner of the transcript view
- Click into the transcript where the associated text ends
- Click the 'Save' button in the lower right corner of the transcript
- Voilá! Now when you hit the excerpt in a search or filter, you'll have both the clip and the text in the resulting 'hit.'
Finally, note that the transcript editor is always active for modification. The 'End' marker will automatically adjust as any editing within the boundaries of an already synchronized portion of text takes place.
Linking Media Files to Descriptors
Upon creating or importing a media file to Dedoose, note that it is not yet linked to any descriptors. This is indicated through the red-colored 'Descriptor: 0' button in the upper-right corner of the media viewer.
To create the relationship between the media file and associated descriptor data, click this red Descriptor button to open the linking pop-up. Clicking the 'Link' button for the appropriate descriptor establishes this relationship. In the example below, the document has been linked to the descriptor with ID = '7.05' As an alternative, you can also click the 'Create and Link Descriptor' button in the lower right corner of the pop-up if the data for the particular case has not yet been added to the descriptor set.
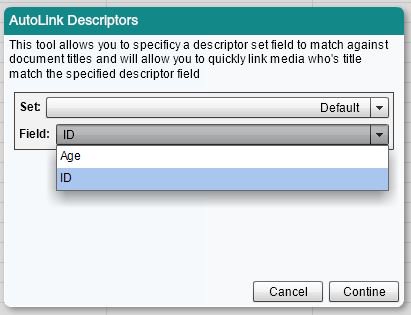
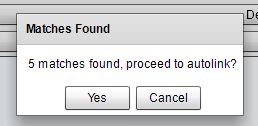
Auto Linking Descriptors
Descriptors can be automatically linked to media files given a column with the document titles exactly as they appear in Dedoose. This will need to include any format in the name, for example sample.docx will need .docx in the field value.

To do this: 1. Click the Descriptors tab 2. Click Auto Link at the bottom of the page

Note:
- Only one descriptor from each descriptor set can be linked to a particular media file. However, one descriptor can be linked to any number of media files where, for example, you interview a particular person multiple times in the course of a study
- Descriptors can be linked and unlinked to media files at any time. It is suggested, however, that this relationship be established when submitting media files to the system or as soon as possible when data are available in the system, as many Dedoose analysis features draw upon these relationships.